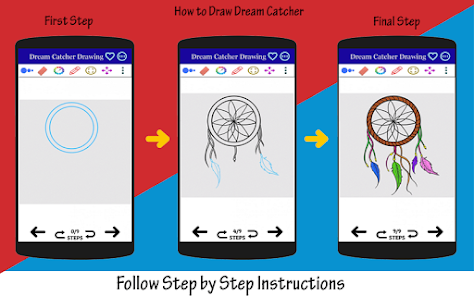
Weave Your Own Sanctuary: Create a Toba-Inspired Dreamcatcher in 5 Easy Steps
Ever found yourself gazing at the moonlit sky, wishing you could capture a little bit of that ancient magic for yourself? Imagine a handcrafted piece, infused with intention and a touch of otherworldly wonder, hanging above your bed, filtering your dreams. Dreamcatchers, with their intricate webs and dangling adornments, have long been associated with protection and positive energy. But what if we told you that you could create one with a unique, Toba-inspired twist?
The Toba people, indigenous to the Gran Chaco region of South America, possess a rich cultural heritage, often reflected in their art and spiritual practices. While traditional dreamcatchers have Ojibwe roots, we can draw inspiration from the Toba’s connection to nature and their artistic sensibilities to craft a truly unique and meaningful dreamcatcher. This guide will walk you through five simple steps to create your very own Toba-inspired dreamcatcher, bringing a touch of this distinct magic into your personal space. Get ready to embark on a creative journey that’s surprisingly easy and deeply rewarding.
Step 1: Gathering Your Natural and Meaningful Materials
The heart of a Toba-inspired dreamcatcher lies in its connection to the natural world. Unlike commercially produced versions, we’ll focus on materials that evoke the earthy, organic aesthetic often found in indigenous crafts. Think beyond just the basic hoop and string; let’s infuse your creation with intention from the start.
- The Hoop: While a traditional wooden embroidery hoop works perfectly, consider seeking out a naturally fallen branch that can be bent into a circle. Alternatively, look for sustainably sourced willow or rattan hoops. The imperfections of natural materials add character and a story to your piece.
- The Webbing: Instead of synthetic thread, opt for natural fibers. Unwaxed cotton twine, hemp cord, or even thin strips of natural leather or suede can create a beautiful, textured web. Think about the colors of the earth – natural beiges, browns, and muted greens.
- Adornments: This is where you can truly channel Toba inspiration. Consider:
- Feathers: Ethically sourced feathers are a classic dreamcatcher element. Look for those with interesting textures or patterns.
- Seed Pods and Beads: Small, dried seed pods, wooden beads, or even polished stones can add visual and tactile interest.
- Natural Charms: Perhaps a small, smooth piece of driftwood, a sun-bleached shell, or even a pressed flower can symbolize your intentions.
- Leather or Suede Strips: These can be used to wrap the hoop and create hanging elements.
(Internal Link Opportunity: If you have a blog post about ethical crafting or the symbolism of natural materials, link it here.)
Step 2: Crafting the Core: The Hoop and Initial Wraps
Once you have your materials, it’s time to begin building the foundation of your dreamcatcher. This step involves preparing your hoop and starting the process of wrapping it.
- Preparing the Hoop: If you’re using a natural branch, ensure it’s dry and free of any sharp edges. Sand it down gently if needed. If using a pre-made hoop, you can leave it as is or wrap it with your chosen leather or suede strips for a softer, more organic feel.
- Securing the Wrap: Start by tying a secure knot at one point on the hoop. Then, begin wrapping the strip around the hoop, overlapping slightly with each pass. Secure the end with another knot or a dab of strong craft glue.
- Attaching Your Webbing Material: Choose a point on the hoop to begin weaving your web. Tie a secure knot with your twine or cord. Leave a small tail that you can later tie off or tuck away.
Step 3: Weaving the Web: A Delicate Dance of Intention
This is the most iconic part of creating a dreamcatcher. The weaving pattern, while often perceived as simple, is rich with meaning. We’ll be creating a basic, repeating pattern that allows your natural materials to shine.
- The First Loop: Take your webbing material and loop it around the hoop, creating a new knot about an inch or two away from your starting point. Pull it snug, but not so tight that it distorts the hoop.
- Subsequent Loops: Continue this process around the hoop, maintaining a consistent spacing between each knot. Aim for 6-10 knots for a standard-sized hoop. The spacing is crucial for achieving a balanced web.
- Creating the Next Layer: Once you’ve completed the first circle of knots, you’ll start the second layer. Instead of looping around the hoop, you’ll pass your webbing material through the center of the previous knot. Then, you’ll form a new knot on the webbing itself, pulling it taut.
- The Center: Continue weaving in this manner, working your way towards the center of the dreamcatcher. As you progress, you can gradually reduce the spacing between your knots, creating a tighter, more intricate web. You can also choose to leave a small opening in the center, as is traditional.
(Tip: If you’re struggling with the knots, search for “how to tie a lark’s head knot” or “basic dreamcatcher knot tutorial” for visual aids.)
Step 4: Adorning Your Creation: Adding Toba-Inspired Touches
Now comes the fun part – personalizing your dreamcatcher with the beautiful, natural elements you gathered. This is where the Toba inspiration truly comes to life.
- Feather Placement: Tie feathers onto the end of your webbing as it hangs down from the hoop. You can also tie shorter lengths of twine and attach feathers to those, creating multiple dangling strands.
- Seed Pods and Beads: Thread seed pods, wooden beads, or stones onto the hanging strands of twine. Vary the lengths and combinations to create visual interest.
- Natural Charms: Attach larger charms, like your piece of driftwood or shell, to the bottom of the dreamcatcher or to longer strands that hang lower.
- Tying Off: Once you’re happy with your adornments, securely tie off the end of your webbing material. You can also add a loop at the top for hanging.
(Internal Link Opportunity: If you have a post about the symbolism of different feathers or stones, link it here.)
Step 5: Finding the Perfect Spot and Infusing Intention
Your Toba-inspired dreamcatcher is nearly complete! The final, and perhaps most important, step is to find its rightful place and imbue it with your intentions.
- Placement: Hang your dreamcatcher in a space where you seek peace and positive energy. Above your bed is traditional, but it can also be a beautiful addition to a living room, a meditation space, or even an office. Consider the direction it faces – some believe facing east allows it to catch the morning sun and its purifying rays.
- Infusing Intention: Hold your dreamcatcher in your hands. Close your eyes and visualize the dreams and aspirations you wish to attract. Speak your intentions aloud or silently focus on them. Think about the peace, creativity, and natural connection you wish to bring into your life.
- The Meaning: Remember that this isn’t just a decoration; it’s a personal talisman. The Toba culture, like many indigenous cultures, emphasizes the spiritual significance of handmade objects. Your dreamcatcher is a reflection of your journey and your connection to the world around you.
(External Link Opportunity: Link to an authoritative source on the spiritual significance of indigenous crafts or the Toba culture for further learning.)
Creating a Toba-inspired dreamcatcher is more than just a craft project; it’s an act of mindful creation, a way to connect with nature, and a method of inviting positive energy into your life. By following these five easy steps, you can craft a truly unique piece that holds personal meaning and a touch of ancient magic. So gather your materials, embrace the process, and let your dreamcatcher become a beautiful sanctuary in your home. What intentions will you weave into your creation today?

Additional Information
Weave Your Own Magic: Create a Toba-Inspired Dreamcatcher in 5 Easy Steps
Dreamcatchers are more than just a beautiful craft; they are powerful talismans, traditionally used by the Ojibwe (Chippewa) people to protect sleepers from bad dreams. Inspired by this rich cultural heritage, we can infuse our own dreamcatchers with personal meaning and a touch of Toba-inspired magic. The Toba people, indigenous to the Gran Chaco region of South America, have a deep connection to nature and spirituality, often expressed through their art and traditions. By incorporating elements that resonate with their worldview – like natural materials and symbolic patterns – we can create a dreamcatcher that feels uniquely enchanting.
This guide breaks down the process into 5 easy steps, making it accessible for anyone looking to bring a little bit of protective magic and mindful artistry into their lives. Whether you’re a seasoned crafter or a complete beginner, you’ll be able to weave your own mesmerizing dreamcatcher from the ground up, just like the comprehensive guides found at DIY Blissful and The Craftaholic Witch suggest. We’ll also touch upon a sustainable approach, as highlighted by Craft Push, ensuring your creation is as kind to the earth as it is to your dreams.
Step 1: Gather Your Enchanted Materials (The Foundation of Your Magic)
The true beauty of a Toba-inspired dreamcatcher lies in its connection to the natural world. For this step, think about the materials that evoke a sense of earthiness, strength, and the spirit of the natural world, much like the Toba people would choose.
- The Hoop: Traditionally, dreamcatchers are made with a willow branch hoop, symbolizing resilience and the circle of life. For a Toba-inspired feel, consider using natural wood hoops readily available at craft stores. If you can source sustainably harvested willow or other natural wood, even better. The size of your hoop will determine the overall scale of your dreamcatcher.
- The Webbing Material: This is where you can really infuse Toba-inspired elements. Instead of just standard yarn or thread, explore:
- Natural Fibers: Cotton twine, hemp cord, or even thin strips of natural leather evoke a primal, earthy feel.
- Beads and Charms: Look for beads made from wood, seeds, bone, or natural stones. Consider incorporating small animal figurines or feathers (ethically sourced, of course) to represent spirits or natural forces.
- Colors: Think about the natural palettes of the Gran Chaco region – earthy browns, muted greens, ochre yellows, and sky blues.
- The Hanging Material: This could be more of the same natural fiber you used for the webbing, or you can opt for a slightly thicker, more textured cord for a stronger visual impact.
- Decorative Embellishments: This is your chance to add layers of Toba-inspired symbolism.
- Feathers: Crucial to the traditional dreamcatcher, feathers represent lightness, air, and the ability to fly over nightmares. Opt for natural, ethically sourced feathers in earthy tones.
- Beads: Continue to incorporate wooden beads, seeds, or even carved stones that might hold personal significance.
- Natural Findings: Small, interesting twigs, dried flowers, or smooth stones can add unique texture and meaning.
Sustainable Tip: If you’re aiming for a sustainable dreamcatcher, look for pre-loved craft supplies, use natural fibers you already have, or even repurpose materials from nature that have fallen naturally.
Step 2: Weave the Web of Protection (The Heart of the Dreamcatcher)
This is the core of your dreamcatcher, where the magic truly begins to form. Inspired by the intricate artistry found in Toba crafts, aim for a balanced and aesthetically pleasing web.
- Secure the Starting Thread: Tie one end of your chosen webbing material securely to your hoop using a strong knot. Leave a tail of a few inches.
- Create the First Loop: Bring the thread over the hoop and loop it around the starting point. Then, pass the thread through the loop you just created and pull it snug to form your first knot. This is a simple overhand knot around the hoop.
- Continue Around the Hoop: Move a short distance along the hoop (about 1-2 inches) and repeat the process: bring the thread over the hoop, loop it around the hoop, pass the thread through the loop, and pull snug. Continue this around the entire hoop, creating evenly spaced knots. The distance between your knots will affect the final look of your web – smaller gaps create a denser web.
- Start the Second Layer: Once you’ve completed the first circle, move to the center of the first knot you made. Pass your thread through this center point.
- Weave the Web: Now, instead of looping around the hoop, you’ll loop around the thread of the previous knot. Bring the thread over the existing thread of the first knot, then pass the thread through the loop you just created and pull snug. Continue this pattern, moving towards the center of the dreamcatcher. As you weave, you can start incorporating your beads. Thread them onto your webbing material before making each knot.
- The Center Opening: Continue weaving inwards until you have a small opening in the center. This opening is traditionally where good dreams are believed to enter. You can leave it as is, or add a single, significant bead or feather to its center.
Analysis from Search Results: The DIY Blissful and The Craftaholic Witch guides emphasize how surprisingly easy this process is, and they’re right! The repetitive nature of the knotting can be quite meditative. The key is to maintain consistent tension to create a beautiful, symmetrical web.
Step 3: Adorn with Earthly Charms (Infusing Toba Spirit)
This is where your Toba-inspired dreamcatcher truly comes alive, reflecting a deep appreciation for the natural world.
- Feather Placement: Traditionally, feathers are attached to the bottom of the dreamcatcher, dangling from the hoop. You can attach them directly to the hoop with a bit of thread or cord, or create small loops of thread from the web itself to hang them from. Consider arranging them in a way that feels balanced and visually appealing.
- Bead Clusters: Group beads together on the hanging threads for a more substantial and decorative effect. You can also tie smaller loops of thread from the main web and attach single beads or small clusters to these.
- Natural Embellishments:
- Twigs: Small, delicate twigs can be tied onto the hoop or integrated into the hanging threads, adding an organic, textured element.
- Dried Flowers: If you’ve dried flowers that hold meaning for you, they can be carefully attached to the hoop or hanging threads.
- Seed Pods: Natural seed pods can be strung onto threads or tied directly to the hoop, adding a unique textural and visual appeal.
Toba Inspiration: Think about how the Toba people use natural materials with reverence. Each element should feel intentional. Consider the patterns and symbols they might incorporate in their basketry or textiles – can you translate that into the arrangement of your beads or feathers?
Step 4: Create a Sacred Hanging Loop (For a Touch of Magic)
A sturdy and aesthetically pleasing hanging loop is essential for displaying your dreamcatcher.
- Choose Your Material: Select a piece of your chosen hanging material – this could be the same natural fiber used for the web, or something slightly thicker for more presence.
- Form the Loop: Fold the material in half to create a loop.
- Attach to the Hoop: Bring the folded end of the material up and over the top of your dreamcatcher hoop.
- Secure with a Knot: Take the two loose ends of the material and pass them through the loop you created. Pull the knot snug, securing it firmly to the hoop. Ensure the loop is strong enough to support the weight of your dreamcatcher.
Pro Tip: You can also add beads to the hanging loop for an extra touch of decoration and to tie in with the overall design.
Step 5: Hang and Embrace the Magic (Where Dreams Take Flight)
Your Toba-inspired dreamcatcher is now complete! The final step is to find its perfect resting place.
- Placement: Traditionally, dreamcatchers are hung above a sleeping area to filter bad dreams. However, you can also hang yours in a living space as a beautiful piece of art and a reminder of your connection to nature and spirituality.
- Intention: Before you hang it, hold your dreamcatcher and imbue it with your intentions. Think about protection, peaceful sleep, positive dreams, or simply the beauty and grounding energy of the natural elements you’ve used.
Analysis from Search Results: The “easy instructions with video” mentioned by The Craftaholic Witch are a great reminder that visual guidance can be incredibly helpful, especially for the webbing process. While we’ve provided detailed steps, don’t hesitate to seek out videos if you feel you need more visual clarity.
By following these five easy steps and infusing them with the spirit of the Toba people’s deep connection to nature, you can create a dreamcatcher that is not only visually stunning but also a powerful talisman for your home. It’s a journey of mindful creation, a touch of magic woven with natural elements, and a beautiful way to filter your dreams and invite positive energy into your life.
